
How to Avoid Spam Filters Your Cold Outreach Guide
Learn how to avoid spam filters with this practical guide. Get expert tips on technical setup, email content, and list hygiene for cold outreach.
Read article
At its core, setting up DKIM is a three-part dance: you generate a special cryptographic key pair from your email provider, you publish the public half of that key in your domain’s DNS records, and then you flip the switch to start signing your emails. This digital signature is what proves to the world your emails are legit and haven't been messed with, which is a huge deal for staying out of the spam folder, especially for cold outreach.
If your cold emails are consistently landing in spam, a missing or broken DKIM setup is one of the first places I'd look. What used to be a technical nice-to-have is now absolutely essential. Thanks to recent mandates from Google and Yahoo, sending cold emails without proper DKIM authentication is like showing up to airport security without a boarding pass—you’re just not getting through.
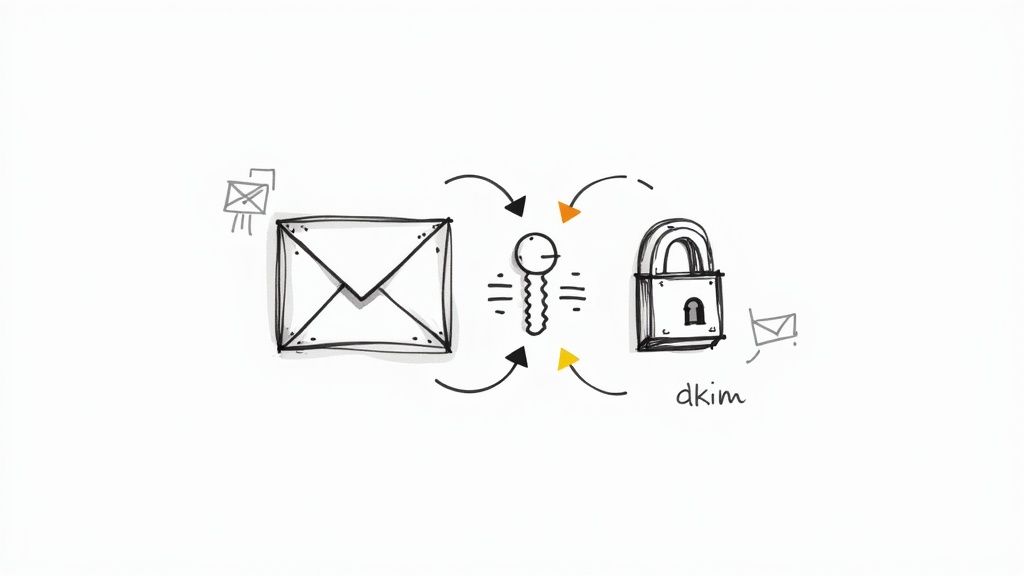
Think of DKIM (DomainKeys Identified Mail) as a digital handshake. It attaches a cryptographic signature to your emails, and when that email arrives, the receiving server can check that signature. This simple check confirms two critical things:
This verification is your best defense against spoofing, where someone pretends to be you to send scammy emails. By getting DKIM right, you start building a foundation of trust with inbox providers like Gmail and Outlook, which directly improves your sender reputation.
The days of DKIM being optional for cold email are long gone. This isn't just a recommendation anymore; it's a requirement. The 2024 mandates from major platforms made DKIM, SPF, and DMARC table stakes for anyone sending emails, but it hit the cold email world particularly hard.
This industry-wide change means that without a valid DKIM setup, your outreach is fighting an uphill battle. You can have the best copy and the cleanest contact list, but your emails will likely get flagged as suspicious and dumped into spam.
A common misconception I see on Reddit forums like r/coldemail is that DKIM is only for large-scale email marketers. The reality is that for cold outreach, where you're contacting people who don't know you, DKIM is even more critical for establishing that initial layer of trust. Someone on Reddit recently posted that their open rates jumped from 5% to 45% just by fixing their DKIM record.
So, how does it actually work? Under the hood, DKIM uses a pair of cryptographic keys: a private key and a public key.
The private key lives on your sending server, kept secret and safe. It’s used to create the unique digital signature that gets attached to every email you send. The public key, on the other hand, is published in your domain's DNS records for anyone to see.
When an email lands in a recipient's inbox, their server looks up your public DNS key to verify the signature. If the keys match up, the email passes the DKIM check. It's a simple but incredibly powerful system that forms the backbone of modern email security.
Getting DKIM right is just one piece of the puzzle. For a complete strategy, you’ll want to look into these 10 Email Deliverability Best Practices to Master, which also cover its partners in crime, SPF and DMARC.
If you're running any kind of outreach from a Google Workspace account, getting DKIM set up is non-negotiable. It’s the difference between landing in the primary inbox and getting flagged by spam filters before your prospect even sees your subject line.
Let's walk through exactly how to get this done right inside your Google Admin console.
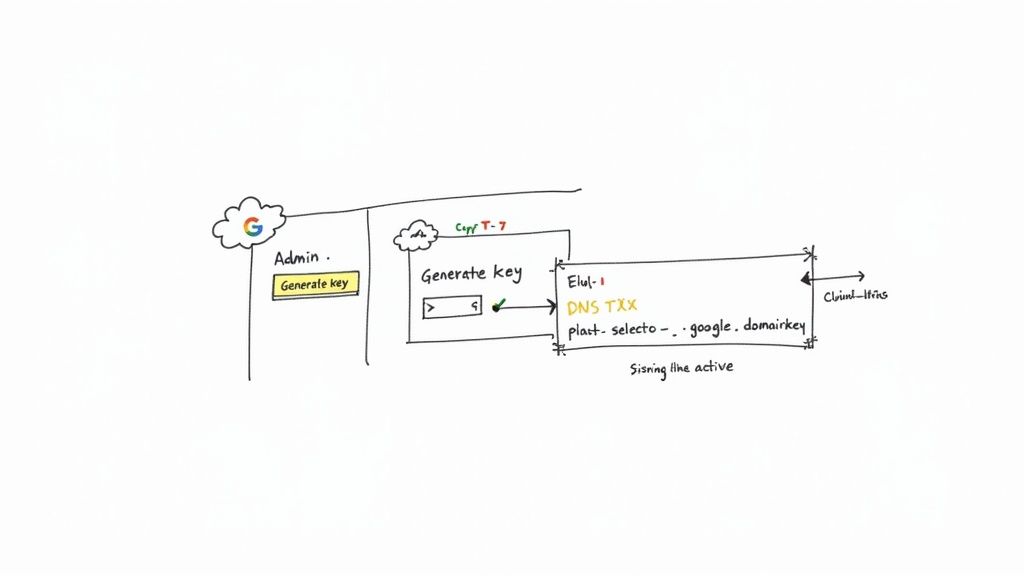
First things first, you need to log into your Google Admin account. From the main dashboard, your path is Apps > Google Workspace > Gmail.
Once you're in the Gmail settings, hunt down the option labeled “Authenticate email.” This is where you’ll generate the key.
You'll see your domain listed, likely with a status that says "Not authenticating email." That's what we're here to fix. Go ahead and select your domain to get started. On the next screen, you’ll see an option to generate a new record.
A question I see all the time on Reddit is whether to pick a 1024-bit or 2048-bit key. Always go with the 2048-bit key. It's the modern standard and offers much stronger encryption. Years ago, some DNS providers had trouble with the longer string, but that's rarely an issue now.
After Google works its magic, it will spit out two critical pieces of information:
google._domainkey (The "google" part is what's known as the DKIM selector.)v=DKIM1;. This is your public key.Make sure you copy that entire TXT record value. I mean all of it. Even one missing character will cause the whole thing to fail.
Now, with your new host name and value in hand, it’s time to head over to wherever you manage your domain’s DNS records. This could be GoDaddy, Cloudflare, Namecheap, or another registrar.
You're going to create a new TXT record. The interface will look a little different depending on your provider, but the fields are always the same:
TXTgoogle._domainkey (Be careful here. Some providers automatically add your domain, so you might just need google._domainkey. If you enter the full google._domainkey.yourdomain.com, it can cause an error.)v=DKIM1;... string you copied from the Google Admin console.This is where things most often go wrong. I saw a Reddit thread where someone troubleshot for hours only to realize their DNS provider had automatically put quotation marks around the DKIM key, which invalidated it. It has to be one single, unbroken entry without extra formatting.
After you save the new TXT record, you have to play the waiting game while it propagates across the internet. This can take anywhere from a few minutes to 24-48 hours, although it's usually on the faster side.
Once you’ve given it some time, pop back into the "Authenticate email" section in your Google Admin console. Now, you can hit the "Start authentication" button.
Google will then check your domain's DNS for the public key you just published. If it finds the record and everything matches, the status will flip to a beautiful, green "Authenticating email." That’s your confirmation—DKIM is officially active, and your email deliverability just got a serious boost.
Setting up DKIM in a Microsoft 365 environment has its own unique quirks. Microsoft automatically gives you a default DKIM setup for your initial .onmicrosoft.com domain, which is fine for internal emails. But relying on that for your actual business domain is a huge, yet common, mistake when it comes to cold outreach.
That default setup often trips up DMARC alignment checks, which can put a serious dent in your sender reputation. To make sure your emails are seen as legit by receiving servers, you absolutely have to create and enable your own custom DKIM keys.
Think of Microsoft's default DKIM as a generic key to a building—it gets you in, but it doesn't prove you belong in a specific office. It doesn't tie the authentication signature directly and exclusively to your sending domain. This is what leads to alignment problems, where the domain in your "From" address doesn't perfectly match the domain in the DKIM signature (the d= tag).
For cold email, where every little trust signal is scrutinized, that ambiguity is a killer. By generating your own custom DKIM keys, you take full control. You ensure perfect DMARC alignment and send a clear signal to inbox providers that you're a responsible sender. It’s a foundational step for building a strong sender reputation.
First things first, you'll need to navigate to the Microsoft 365 Defender portal. The path you're looking for is usually Email & collaboration > Policies & rules > Threat policies > Email authentication settings.
Once you land there, click over to the DKIM tab. You'll see a list of your domains. If you see a message saying "No DKIM keys saved for this domain," that's your cue to get to work.
At this point, Microsoft will generate two unique CNAME records for you. This is a big departure from Google Workspace, which uses TXT records. Microsoft uses these CNAMEs to point to your tenant domain, which cleverly allows them to handle key rotation for you automatically down the line.
The user interface can throw people for a loop. A common trip-up I see on Reddit is people hunting for a TXT record value like they would for a Google setup. Just remember, Microsoft 365 is all about CNAME records for custom DKIM.
Microsoft will hand you two hostnames and two "points to" addresses. They'll look something like this:
Record 1:
selector1._domainkeyselector1-yourdomain-com._domainkey.yourtenant.onmicrosoft.comRecord 2:
selector2._domainkeyselector2-yourdomain-com._domainkey.yourtenant.onmicrosoft.comNow, log in to your DNS provider—whether it's GoDaddy, Cloudflare, or another service—and create two new CNAME records. Copy and paste these values carefully. Pay extra attention to the yourdomain-com part; notice how the dot in your domain name gets swapped for a hyphen.
Precision is everything here. A single typo will cause the whole thing to fail. If you're managing a bunch of domains and need to generate keys in bulk, a dedicated DKIM generator tool can be a real time-saver by formatting the records perfectly for you.
Once you've added the CNAME records to your DNS, you have to play the waiting game while they propagate across the internet. This can take anywhere from a few minutes to 24 hours, but in my experience, it's usually on the faster side.
After giving it some time to bake, head back to the DKIM settings in the Microsoft 365 Defender portal. Find your domain and flip the toggle to "Enable" the "Sign messages for this domain with DKIM signatures" option.
Microsoft will then run a check to find the CNAME records you just published. If it finds them, the status will update, and your custom DKIM policy will be live. You’ve now locked in one of the most important deliverability signals for your Microsoft 365 account, giving your cold outreach campaigns a much better shot at success.
When you bring in a third-party platform for your outreach—whether it’s a big-name ESP like SendGrid or a specialized tool like Instantly—you're giving them permission to send emails using your domain. This is a critical point that trips a lot of people up. The DKIM keys you set up for Google Workspace or Microsoft 365 don't apply here; each sending service needs its own unique digital handshake.
Think of it this way: your Google Workspace DKIM key tells the world, "This email genuinely came from my personal inbox." A separate DKIM key for your sending platform says, "This email genuinely came from my bulk sending service, and I authorized it." Skipping this step is one of the most common reasons cold email campaigns tank, as receiving servers see an unauthenticated email coming from a source they don't recognize.
First things first, you need to find where your sending tool hides its authentication settings. Log into your platform and look for sections named something like "Sending Domains," "Domain Settings," or simply "Authentication." This is command central for getting the specific DNS records you need to add.
You'll notice something different here. While Google Workspace typically uses a TXT record, most third-party platforms will give you CNAME records instead. This isn't just a technical quirk; it’s a smart move that benefits you in the long run.
s1._domainkey.yourdomain.com points to s1.domainkey.sendgrid.net), the platform can rotate the cryptographic keys on their end automatically. You never have to touch your DNS again for key updates.I remember seeing a post on Reddit where someone in r/coldemail was tearing their hair out for a week because their Mailgun emails kept failing DKIM. The problem? They were looking for a big block of text to copy into a TXT record, but Mailgun provided CNAME records. It's a subtle but crucial difference that can really cause headaches if you're not expecting it.
Got your CNAME records? Great. The next part of the process should feel familiar. Head over to your DNS provider—GoDaddy, Cloudflare, Namecheap, wherever your domain's records live—and get ready to create a few new CNAME entries.
Here are a couple of real-world examples of what you might see:
| Record Type | Host / Name | Value / Points To |
|---|---|---|
| CNAME | em123._domainkey |
u456789.wl.sendgrid.net |
| CNAME | s1._domainkey |
s1.domainkey.acme.com |
Precision is everything here. You have to copy these values exactly as the platform provides them. Be especially careful with the hostnames. Some DNS providers, like GoDaddy, automatically add your domain name at the end, so you'd only need to paste the em123._domainkey part. Others require the full name. For a deeper dive into these nuances, check out our detailed guide on DNS setup for cold email.
Once the records are published, pop back into your sending platform's dashboard. You should see a "Verify," "Validate," or "Check Status" button right there in the domain settings. Go ahead and click it. This tells the service to perform a DNS lookup to find the records you just added.
Pro Tip: Don't freak out if it fails on your first click. DNS changes aren't instant; they need time to propagate across the internet. Give it a good 30 minutes, then try again. If it's still not working after a couple of hours, you almost certainly have a copy-paste error or a hostname formatting issue.
Once you get that green checkmark, you're good to go. You've officially authorized that platform to send on your behalf. Now, whether an email is sent from your personal mailbox or your outreach tool, it will carry a valid DKIM signature, giving it the stamp of authenticity it needs to land in the inbox.
You’ve generated the keys, navigated your DNS provider’s dashboard, and hit publish on the new record. Now what? The biggest mistake I see people make is walking away at this point, assuming the job is done. Verification isn't just a final checkbox; it's the only way to be certain your DKIM setup is actually working.
Without this final check, you're essentially flying blind. A tiny typo or syntax error in that long string of characters could be silently sabotaging your email deliverability, and you'd never know until it's too late. Confirming everything is correct before you send your next campaign gives you the peace of mind that your emails are being properly signed and authenticated.
This flowchart breaks down the basic decision path, showing how the setup differs if you're sending directly from your provider versus using a third-party service.
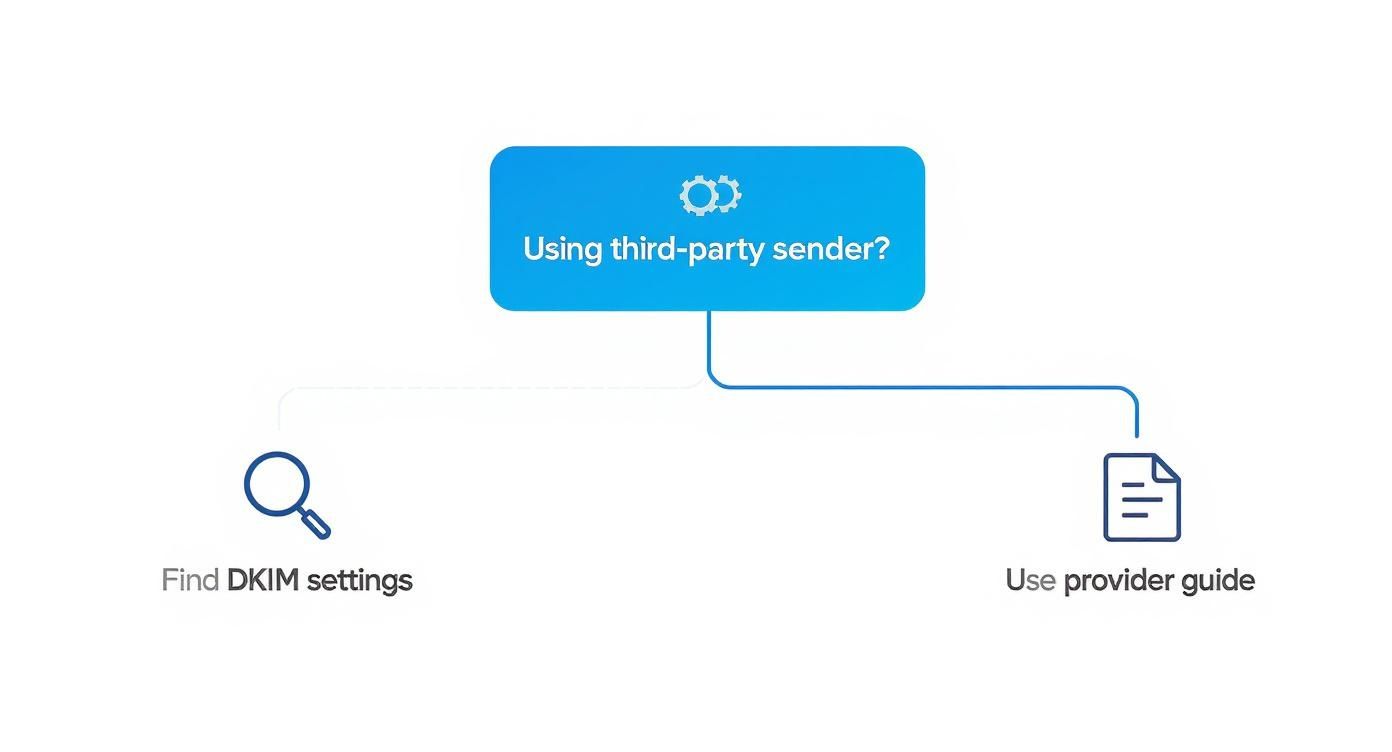
As you can see, the path diverges based on your sending infrastructure, which is why your verification approach needs to match your specific setup.
The good news is you don’t need to be a DNS expert to check your work. There are plenty of fantastic free tools out there that do all the heavy lifting for you by looking up your public DKIM record. These tools act just like a receiving mail server would, querying your domain’s DNS to find and validate the key.
The process couldn't be simpler:
yourcompany.com).google for Google Workspace or selector1 for Microsoft 365.A successful check will display your public key and give you a clear "pass," confirming it’s published correctly. For a quick and reliable check, you can use a free DKIM checker tool to see your record's status instantly. It removes all the guesswork.
So what happens if the test comes back with an error? Don't panic. In my experience, most DKIM problems boil down to a handful of common, easily fixable mistakes. Let's walk through the issues that trip people up the most.
Here’s a quick-reference table to help you diagnose and resolve the most frequent DKIM configuration problems.
Common DKIM Setup Errors and Their Solutions
| Error Symptom | Potential Cause | How to Fix It |
|---|---|---|
| "Record not found" | DNS changes haven't propagated yet. | Wait for at least 30 minutes, sometimes up to 24-48 hours, and check again. This is the most common "problem." |
| "Invalid" or "Malformed" record | A copy-paste error introduced extra characters, spaces, or line breaks. | Go back to the source, re-copy the entire TXT record value, and replace the existing one in your DNS settings. |
| "Record not found" (even after waiting) | The selector or domain you're testing doesn't match the one in your DNS. | Double-check the exact selector and domain name your email provider gave you. They must be a perfect match. |
| Record appears truncated or cut off | An older DNS system might not support 2048-bit keys. | See if your provider offers a 1024-bit key alternative. Use this only if the longer key consistently fails. |
By working through these common issues methodically, you can diagnose and fix almost any DKIM problem yourself. Mastering this part of the process is a huge step toward maintaining great deliverability and making sure your emails have the best shot at reaching the inbox.
Once you've navigated the technical setup, the real-world questions start popping up. Managing DKIM isn't a one-and-done task. It’s about keeping up with best practices to maintain a rock-solid sender reputation. Here are some of the most common questions I hear after the DNS records go live.
Think of rotating your DKIM keys like changing a critical password—it’s just good security hygiene. The industry consensus is to rotate your keys every 6 to 12 months. This simple step dramatically shrinks the window of opportunity for a bad actor if your private key ever gets compromised.
Thankfully, most email providers have made this a painless process. You can usually generate a new key while the old one is still active. Just add the new public key to your DNS, activate it in your provider's dashboard, and once you confirm everything is working smoothly, you can safely remove the old one. This ensures zero disruption to your email flow.
Yes, and you absolutely should if you're sending from more than one platform. In fact, it's standard practice for anyone doing serious outreach. You need a dedicated DKIM record for each service that sends email on your behalf.
A typical setup might look something like this:
Each service provides a unique "selector" (e.g., google._domainkey or s1._domainkey). This little piece of text tells receiving mail servers exactly which key to check, keeping your sending streams separate and making it much easier to pinpoint issues if something goes wrong.
The DKIM selector is just a label used to point to a specific public key in your DNS records. It’s the very first part of the DKIM record name, like the selector1 in selector1._domainkey.yourdomain.com.
Why does this tiny detail matter so much? Because selectors are the mechanism that allows you to have multiple, independent DKIM keys on a single domain. Without them, you'd be stuck trying to use one key for all your sending platforms—a true operational and security nightmare. They give you the flexibility to manage each service separately and fix an authentication problem for one platform without breaking everything else.
No, DKIM is not a golden ticket to the inbox. It’s a crucial piece of the puzzle, a foundational trust signal that proves your email is legit. But deliverability is a much bigger game.
Key Insight: I see this on Reddit all the time. Someone will say, "My DKIM, SPF, and DMARC are perfect, why am I in spam?" Think of authentication as just getting you past the first security checkpoint. Your sending practices, list quality, and content determine the rest of the journey.
Inbox providers are looking at a whole host of factors: your domain's reputation, the health of your sending IP, the content of your emails, and how users engage with them (opens, clicks, and spam complaints).
While getting DKIM right is a must, the real deliverability gains come when you pair it with a strong DMARC policy. Many have DKIM in place but fail to enforce it, which severely limits its power. You can learn more about why a strong DMARC policy is critical for deliverability.
Ready to scale your outreach without the technical headaches? InboxKit provides official Google Workspace and Microsoft 365 mailboxes with automated SPF, DKIM, and DMARC setup, so you can focus on closing deals, not configuring DNS. Get your entire cold email infrastructure live in about 10 minutes at https://www.inboxkit.com.
Learn how to avoid spam filters with this practical guide. Get expert tips on technical setup, email content, and list hygiene for cold outreach.
Read articleSPF vs DKIM explained. Learn how they work together, why both are critical for cold email deliverability, and how to configure them to avoid the spam folder.
Read articleExplore b2b email marketing best practices with practical tips to boost open rates, engagement, and conversions in 2025.
Read articleInboxKit provides everything you need to reach the inbox consistently