SPF vs DKIM A Guide to Cold Email Deliverability
SPF vs DKIM explained. Learn how they work together, why both are critical for cold email deliverability, and how to configure them to avoid the spam folder.
Read article
If your business runs on Google Workspace, setting up an SPF record isn't just a good idea—it's essential for email deliverability. Think of it as an official ID badge for your domain. Without it, your emails look suspicious and have a much higher chance of being flagged as spam or rejected outright.
The standard SPF record for Gmail is a simple text string: v=spf1 include:_spf.google.com ~all.
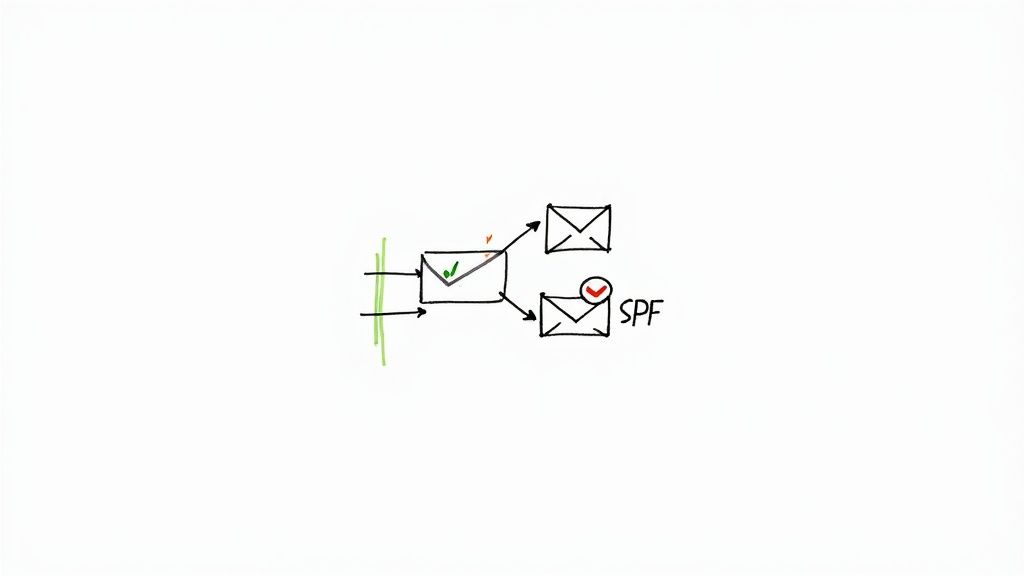
Your Sender Policy Framework (SPF) record is just a line of text added to your domain's DNS settings. Its job is to create a public list of all the servers authorized to send email on behalf of your domain.
When you send an email from your Gmail account, the recipient's mail server performs a quick check. It looks up your SPF record, sees Google's servers on the approved list, and your email passes a critical authentication test. This simple process is a foundational piece of building a strong sender reputation.
For anyone doing cold email outreach, a valid Gmail SPF record is the absolute first step toward landing in the inbox. If it's missing, you're basically telling providers like Outlook and Zoho that your domain isn't properly secured.
You don't have to look far to see the painful consequences of getting this wrong. Just browse Reddit communities like r/sales, and you'll find countless stories of people whose reply rates suddenly tanked, only to discover their DNS records were never configured correctly.
One user on Reddit described launching a major campaign only to find their open rates were near zero. The culprit? A misconfigured SPF record. Their emails were failing authentication and being silently filtered into spam folders, making their entire effort invisible to prospects. A missing or broken SPF record also makes your domain an easy target for spoofing, where spammers forge your email address to send their junk.
This directly tanks your domain's reputation and poisons your ability to reach prospects. It's a small technical detail with massive consequences.
Let's break down the components of that standard Google SPF record. It might look a bit like code, but each part has a very specific job.
| Gmail SPF Record Components |
| :--- | :--- | :--- |
| Component | Example | What It Does |
| Version | v=spf1 | Declares that this is an SPF record (version 1). This part is always the same. |
| Mechanism | include:_spf.google.com | This is the key part for Google. It tells servers to check Google's own SPF record for a list of all their sending IP addresses. |
| Qualifier | ~all | Known as a "soft fail," this tells receiving servers to mark emails from unauthorized sources as suspicious but not necessarily reject them immediately. |
Understanding these pieces helps demystify the process and makes it easier when you need to add other sending services to your record later on.
Google isn't just suggesting you use SPF anymore; they are actively enforcing it. In the fight against spam and phishing, Google and other major inbox providers have rolled out much stricter requirements for all senders.
Since early 2024, senders who don't have basic email authentication like SPF in place see their emails rejected or marked as spam by default. This change was a seismic shift, especially for cold outreach. You can read more about Google's email security initiatives to see how critical these standards have become.
A valid SPF record tells receiving mail servers, "This email is legitimately from me." It’s a simple yet powerful way to build trust and ensure your messages are seen by the right people, not spam filters.
If you only send emails directly from your Google Workspace accounts, setting up your SPF record for Gmail is surprisingly simple. This first record is the foundation of your email authentication, and for many, it's the only one they'll need for Google's services.
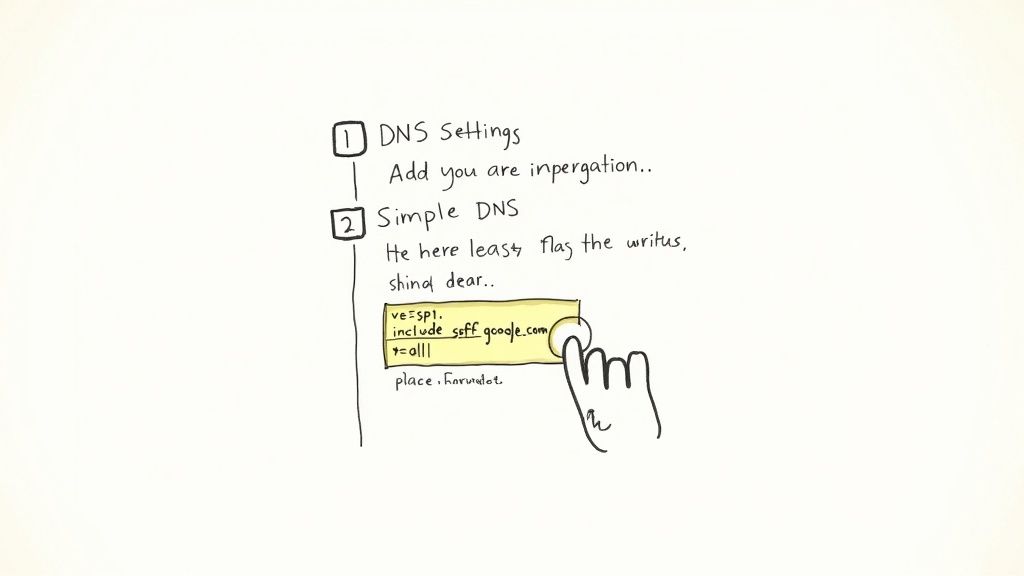
First things first, you need to head over to your domain registrar’s dashboard. This is wherever you bought your domain name—think GoDaddy, Namecheap, or Cloudflare.
Once you’re logged in, look for a section called “DNS Management,” “Advanced DNS,” or something similar. This is your domain's command center, and it’s where we’ll add the new record.
You’ll want to add a new TXT record. This type of record is designed to hold text-based information for outside services to read, which is perfect for SPF. When you go to create it, you'll see a few fields.
yourcompany.com).v=spf1 include:_spf.google.com ~allThat one line is all it takes to authorize Google's massive network of mail servers to send emails for your domain. It’s a small step that makes a huge difference in your deliverability and reputation.
Once you save the record, you’ve done your part. The change isn't instant, though. It needs to propagate across the internet's DNS servers, which can take anywhere from a few minutes to a few hours.
It’s always a good idea to verify your work. To do this, it helps to understand how DNS propagation works. While the official line is that it can take up to 48 hours, I’ve found it’s usually live much faster.
The easiest way to check is with a free online SPF record checker. Just pop in your domain name, and the tool will do a quick lookup. When you see your new v=spf1 include:_spf.google.com ~all record appear, you'll know your foundational Gmail SPF record is set up and working correctly.
This is where things can get a little tricky, especially if you're running cold outreach at scale. If your business only ever sends emails through Google Workspace, that simple include:_spf.google.com is all you need. But the reality is, most businesses use more than one service. The moment you bring on a platform like Mailchimp for newsletters or SendGrid for transactional receipts, you have to update your SPF record for Gmail.
Here’s the golden rule you absolutely cannot break: a domain can only have one SPF record. I see this mistake all the time—people publish multiple TXT records that start with v=spf1. This doesn't work; it just invalidates your entire SPF setup. You have to merge every authorized sender into a single string of text.
include StatementsCombining multiple services into one record is actually pretty straightforward once you see it done. You just line up the different include mechanisms for each service, one after another, right before the final ~all part of the record. Think of each include as a pointer telling receiving servers, "Go look at this other domain's list of approved senders."
Let's walk through a common scenario. Say a small business uses Google Workspace for their day-to-day emails but sends their marketing newsletters through Mailchimp.
include:_spf.google.cominclude:servers.mcsv.netYou don't make two separate records. Instead, you stitch them together into one:
v=spf1 include:_spf.google.com include:servers.mcsv.net ~all
This single record clearly tells mail servers, "First, check Google's list of servers. If it's not there, check Mailchimp's list. If the sending server is on either of those lists, the email is legit."
Now, let's level up for a more typical cold email tech stack. Imagine your sales team uses Google Workspace for their primary mail, HubSpot as their CRM to send automated sequences, and Lemlist for a hyper-personalized outreach campaign.
Here’s how the list of authorized senders would build out:
include:_spf.google.cominclude:hubspot.com (or whatever custom one they provide in your account)include:lemlist.comThe correctly merged SPF record consolidates all of them:
v=spf1 include:_spf.google.com include:hubspot.com include:lemlist.com ~all
That one line authorizes all three platforms, making sure your emails pass this critical authentication check no matter which tool sent them. If you want to get into the weeds on the technical side of things, our comprehensive guide on DNS setup for email deliverability is a great next step.
A classic pitfall is simply forgetting about a service. What if your support team uses a tool like Zendesk to send emails from your domain? If you forget to add
include:mail.zendesk.comto your record, all of your support emails could start failing SPF checks. It's crucial to audit every single service that sends email on your behalf.
Every single email you send, from every platform, contributes to your domain's reputation. When some of your mail passes SPF (like emails from Gmail) while others fail (like those from an unlisted third-party tool), you're sending mixed signals to inbox providers like Google and Microsoft.
This kind of inconsistency can chip away at your reputation and land more of your mail in the spam folder.
By creating one comprehensive SPF record, you're presenting a unified, trustworthy identity. It demonstrates that you have a handle on your entire email ecosystem, which is a major factor in building and keeping great deliverability. Getting this right isn't just a technical task—it's a foundational step for any serious email program.
Even a perfectly good SPF record for Gmail isn't a "set it and forget it" thing. I've seen them break over time, often silently tanking a company's email deliverability. A tiny syntax error or a forgotten sending service can cause authentication to fail, sending your carefully crafted campaigns straight to spam. Think of this as your field guide for troubleshooting the most common issues that trip up even seasoned pros.
You'd be surprised how often this happens. While broad statistics show many domains lack proper setup, the real insights come from specific failures. For cold outreach, a broken SPF record isn't a small error—it's a campaign killer. If you're curious about the data, you can explore the research on SPF and DMARC adoption rates for a general overview.
When you're trying to figure out what's wrong, it helps to map out your sending services. This decision tree boils down the core choice you have to make based on how many platforms are sending email on your behalf.
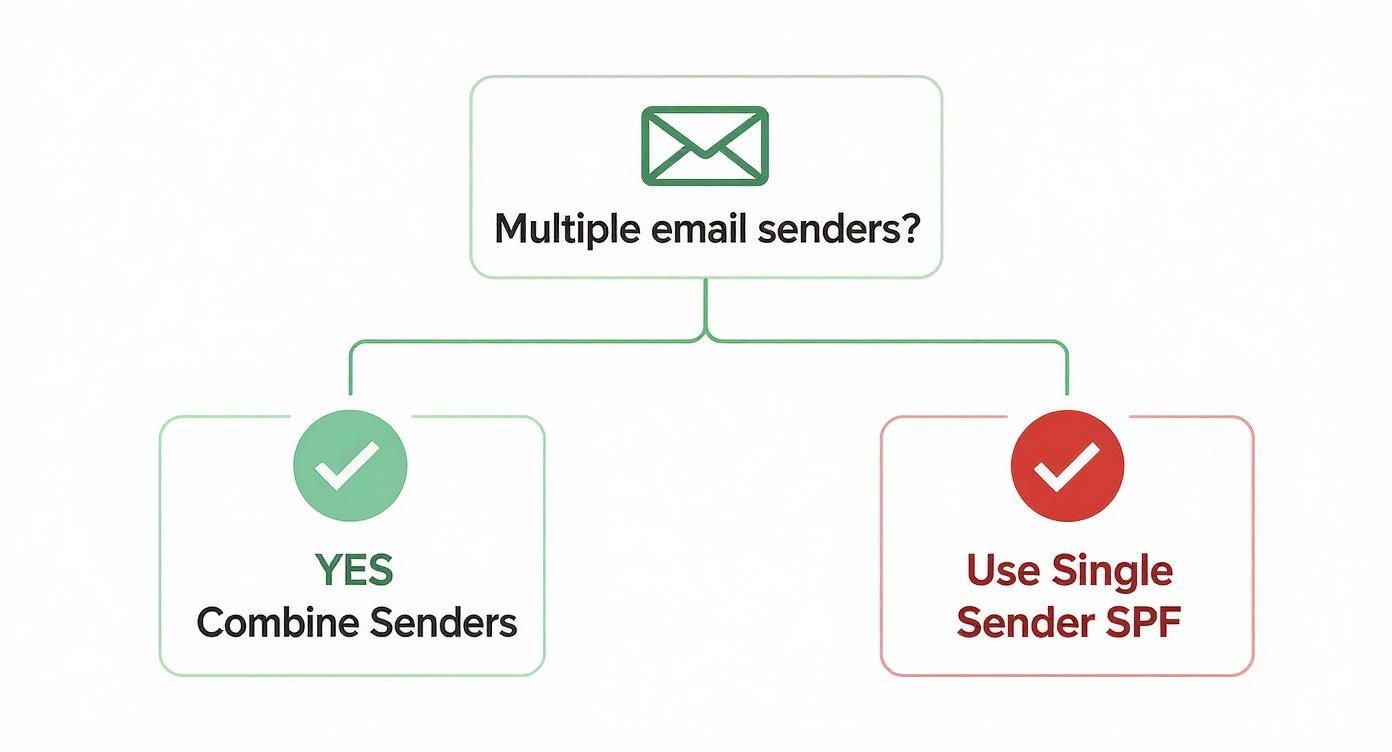
The main takeaway? As soon as you add a second sender, you have to merge records. That’s precisely where most of the following problems begin.
This is the big one. It’s the most notorious SPF issue I see, especially for teams using a bunch of different cloud tools for marketing and outreach. The SPF standard strictly allows a maximum of 10 DNS lookups to check a record. The moment you go over that limit, your SPF check fails.
The real trap here is nested lookups. Each include statement in your record counts as one lookup, but that's not the whole story. Some services have their own include statements within their SPF records. So, a single include:some_service.com could secretly trigger three or four more lookups in the background, blowing past your limit without you even realizing it. I remember seeing a Reddit user in r/sysadmin share their deliverability nightmare; their record had only six visible include statements but was actually making 14 DNS lookups.
The quick-and-dirty fix is to "flatten" your SPF record. This means you replace the include mechanisms with the actual IP addresses (ip4 or ip6) of the services you're using. The big downside is that you now have to manually keep track of any changes to those IPs. For a more permanent solution, you either need to consolidate your sending tools or use a dedicated service that can manage and flatten SPF lookups for you automatically.
Key Insight: That 10-lookup limit is a hard-and-fast rule. Mail servers stop evaluating your record the second it's breached. This results in an SPF PermError (permanent error), which can be even more damaging to your sender reputation than having no record at all.
SPF records are extremely picky. A single misplaced space, a typo in a domain name, or using the wrong qualifier can make the whole thing useless.
I've seen these simple mistakes trip people up again and again:
txt instead of v=spf1: Some DNS providers might tempt you to add txt= at the beginning. Don't. Your record must always start with v=spf1.v=spf1 include:"_spf.google.com" ~all, will break it.all mechanism: Every single SPF record has to end with a qualifier that tells servers what to do with messages that don't match. This is usually ~all (softfail) or -all (hardfail). A record without one is considered incomplete and will fail.Luckily, fixing these is usually pretty easy. Grab your record and pop it into a free online SPF validator like the one from MXToolbox. It will instantly flag any syntax problems or structural errors, showing you exactly what needs to be corrected.
Getting your SPF record for Gmail in place feels like checking IDs at the door—it’s vital, but there’s more work to do. Once SPF is up and running, you’ll want to layer on DKIM and DMARC to turn basic validation into bulletproof trust.
Think of SPF, DKIM, and DMARC as a security team:
If you’re serious about cold outreach and protecting your domain reputation, SPF alone won’t cut it. The full trio is non-negotiable for filtering out spoofers and landing in inboxes.
DKIM (DomainKeys Identified Mail) embeds a digital signature in every email header. That signature proves the content hasn’t been tampered with after it leaves your server. In practice, this seals the message like a wax stamp on an envelope—any tampering breaks the signature.
DMARC (Domain-based Message Authentication, Reporting, and Conformance) sits on top, acting as your policy manager. You choose whether to:
As you fine-tune DMARC, you’ll see reports that reveal every third-party sender using your domain. From there, it’s easy to tighten or loosen enforcement based on real-world data.
While public data offers a broad overview, the practical reality for cold outreach is clear: top performers implement all three protocols (SPF, DKIM, DMARC) without exception. Not doing so is an immediate red flag for inbox providers.
| Protocol | Adoption Rate |
|---|---|
| SPF | 53.7% |
| DMARC | 20% |
That leaves nearly 46% of domains without SPF and a huge gap on DMARC. If you’re wondering how to close that gap or refine your policies, start by exploring broader email deliverability strategies.
Once your DMARC policy is live, keep an eye on configuration drift and spoofers with the DMARC checker. Regular monitoring and updates will cement your reputation as a trustworthy sender.
Once you've got your basic Gmail SPF record in place, you'll inevitably run into a few specific questions. It happens to everyone. Getting these details right is what separates a setup that works from one that's truly bulletproof. Let's dig into a few of the most common things people ask.
After you hit 'publish' on your new SPF record, it has to travel across the internet. This is called DNS propagation. While you might see the change kick in within an hour, the official party line is to give it up to 48 hours to be fully live everywhere.
This lag is all thanks to DNS caching, where servers around the world hang onto old data for a while. You can use an online SPF checker to see how it's propagating, but don't stress if it's not instant. A little patience goes a long way here.
For any standard Google Workspace setup, you should start with ~all (softfail). Think of this as telling receiving servers, "Hey, if an email fails this check, it's a bit suspicious, but don't just block it outright." It’s the safer bet, especially when you're still double-checking every single tool that sends emails for you.
Move to
-all(hardfail) only when you are 100% certain your SPF record is perfect and you have a DMARC policy in place to watch over everything. Jumping the gun with a hardfail is a classic mistake that can get your own legitimate emails blocked.
Yes, absolutely. If you have a server with a static IP that sends emails (like a web server sending notifications), you can add it directly using the ip4 or ip6 mechanism.
For example, your record might look something like this:
v=spf1 include:_spf.google.com ip4:192.168.0.1 ~all
But here's the catch: this only works if that IP address never changes. If it does, authentication for that source breaks immediately. For most third-party services that don’t give you a static IP, using their include statement is always the better, more future-proof move. They handle all the IP updates on their end, saving you from a future deliverability nightmare.
Ready to scale your cold outreach without the technical headaches? InboxKit provides turnkey email infrastructure, automating the setup of SPF, DKIM, and DMARC for hundreds of Google Workspace mailboxes in minutes. Ensure maximum deliverability and protect your domain reputation by visiting https://www.inboxkit.com.
SPF vs DKIM explained. Learn how they work together, why both are critical for cold email deliverability, and how to configure them to avoid the spam folder.
Read articleDiscover the best free email verification tools to boost deliverability for cold outreach. Compare top options and find the right tool to scale safely.
Read articleExplore b2b email marketing best practices with practical tips to boost open rates, engagement, and conversions in 2025.
Read articleInboxKit provides everything you need to reach the inbox consistently